Setup guide
Display case
Seven simple steps to get your display case ready.
- 1
Lay out all components
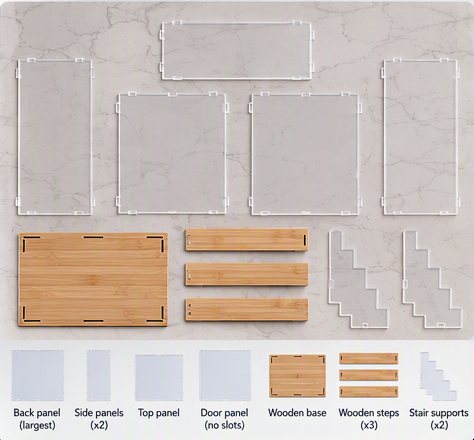
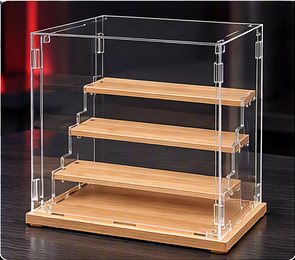
Unpack everything and lay the parts flat on a clean, soft surface. You should have: back panel (the largest), 2 side panels, top panel, door panel (no slots), wooden base, 3 wooden steps and 2 stair supports.
Tip: Check every part is there before you start.
- 2
Remove the protective film
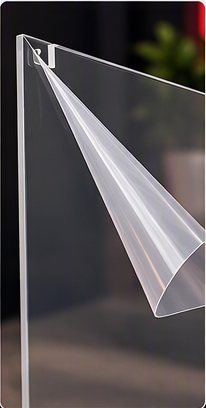
Peel the plastic film off both sides of every acrylic panel.
Tip: Start from a corner. Handle panels by the edges to avoid fingerprints.
- 3
Assemble the outer box
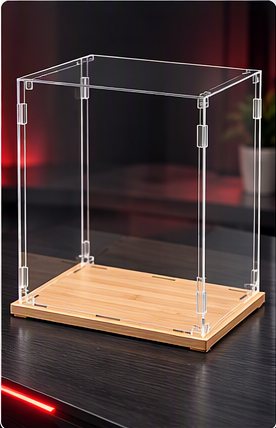
Slot the back, side and top panels into the base.
Tip: Push each panel straight down so it seats fully in its slot.
- 4
Add the wooden steps
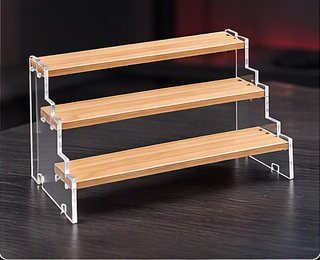
Place the three wooden shelves onto the two stair supports.
- 5
Insert the stair unit
Place the finished stair unit inside the box. It sits on the base and is held in place by the sides.
- 6
Attach the door
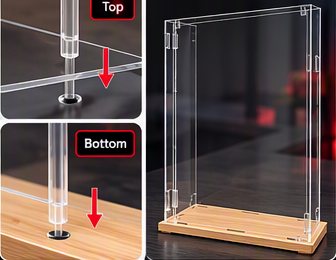
Fit the door panel into the two circular holes in the top panel and the base.
Tip: Line up the top hole first, then lower the door into the bottom hole.
- 7
Display your collection
Your display case is complete. Add your favourite figures, models or collectables.

Need a hand?
If a part is missing or something doesn't fit, email info@hytpoint.com with your order details and a photo, and we'll sort it.